

Mikbotam settings are an application that is used to make it easier for hotspot services, with this Mikbotam can generate usernames and passwords and manage users more easily in displaying an attractive web.
In the Mikbotam application, it creates an intermediary between Telegram and Mikrotik, so this application uses the Telegram API as a bot in adding users and top balances.
If the Mikrotik API is for connecting data on the telegram bot to the proxy. This application makes it very easy for users of residential internet services so that they no longer need to log into Winbox to add user manuals by inputting one by one.
Installing this Mikbotam settings is also very easy so it is not complicated, it only requires a telegram account, web server and also Mikrotik.
Table of Contents
Need to Install MIKBOTAM Mikbotam
Check Router Products from NetData here:
Networks
Inspur
Networks
Access Point
Access Point 


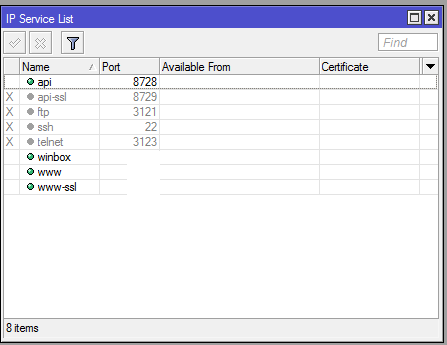
Activate API Service on mikrotik
First we have to activate the MIKBOTAM settings using the Mikrotik API by means of IP -> Services or using the CLI command below:
/ ip service enable [find name = api]
Mikbotam Installation Steps
For the Mikbotam Settings installation steps you first have to install the mikbotam, xampp, telegram and winbox applications.
During the installation, pay close attention to the tutorial below so that there are no problems in the Mikbotam application.
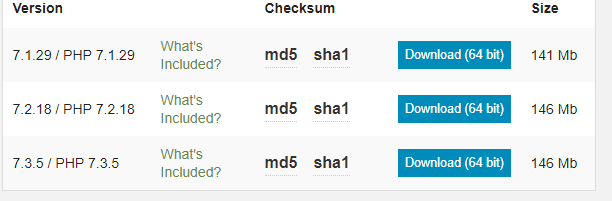
We recommend that you download the mysql Mikbotam or marked with a black box.

Then to download the xampp web server application you select the top one.
While waiting for the download to finish you can install Telegram using your smartphone.
In the telegram application you type @botfather in the search field then click on the account then it will enter the botfather chat place
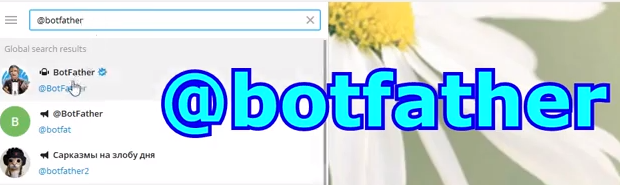
then you can click Start to start making bots on telegram.

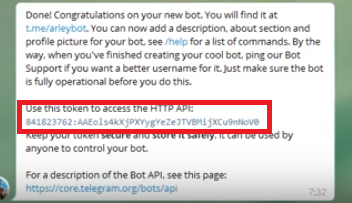
Then type / newbot then you have to name the telegram. After that give a bot name you must provide a username for your bot without having to use spaces and with the suffix “bot” in your username for example @Netdata_bot.
When it’s finished, the botfather will display your bot’s API token which will be used for configuration in the Mikbotam Settings application.
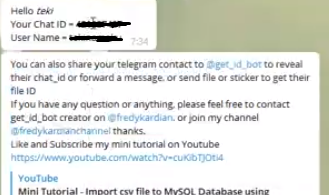
To search for your telegram account id and username, you can use the type of username @get_id_bot in the search field, then click start in the chat section to get the get id account.
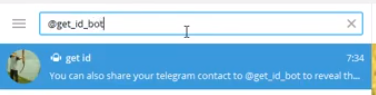
If you have clicked start then Telegram will display the id and username in your account.
Next, you install the xampp application, the easy way is just click next until it’s finished. If it is already installed, you can extract the Mikbotam settings that you downloaded earlier.
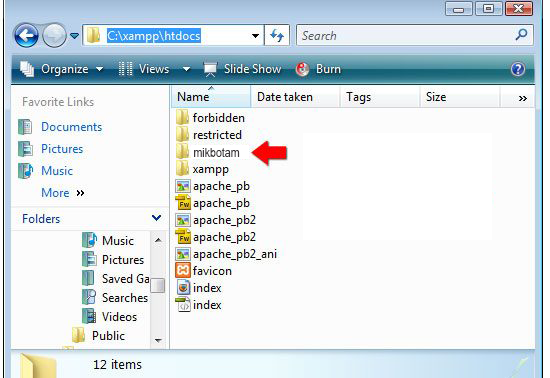
If you have, then you can copy all the folders in Mikbotam Settings into the folder you created first, namely C: xampphtdocsMikbotam in the “Mikbotam” folder, you can change the name as you wish.
Now you can open a browser then type localhost / phpmyadmin then click enter.
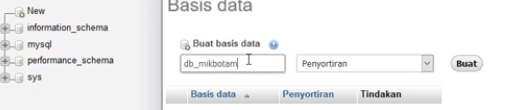
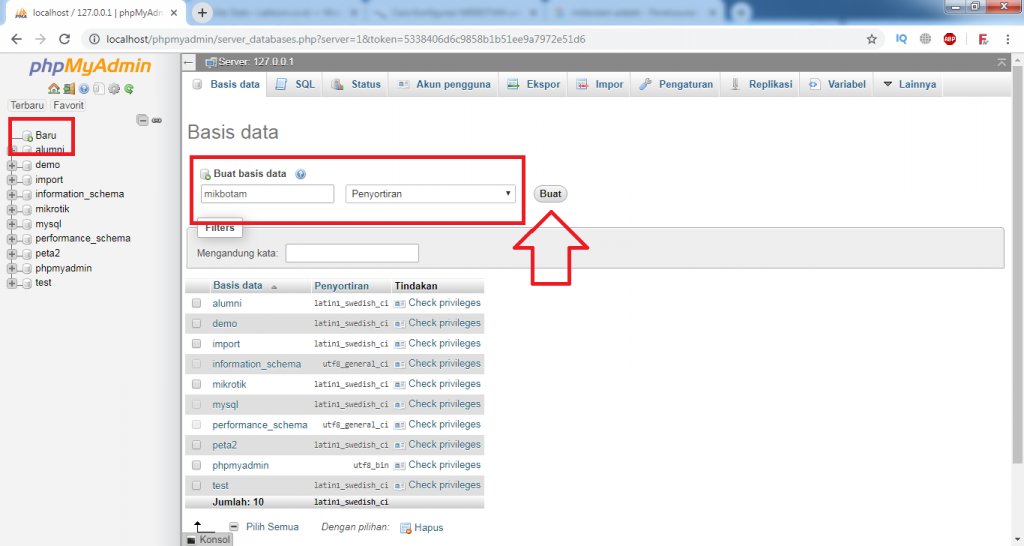
Here we use phpmyadmin to create a database by simply entering the database column and giving your database a name here by giving the name db_mikbotam then clicking create.
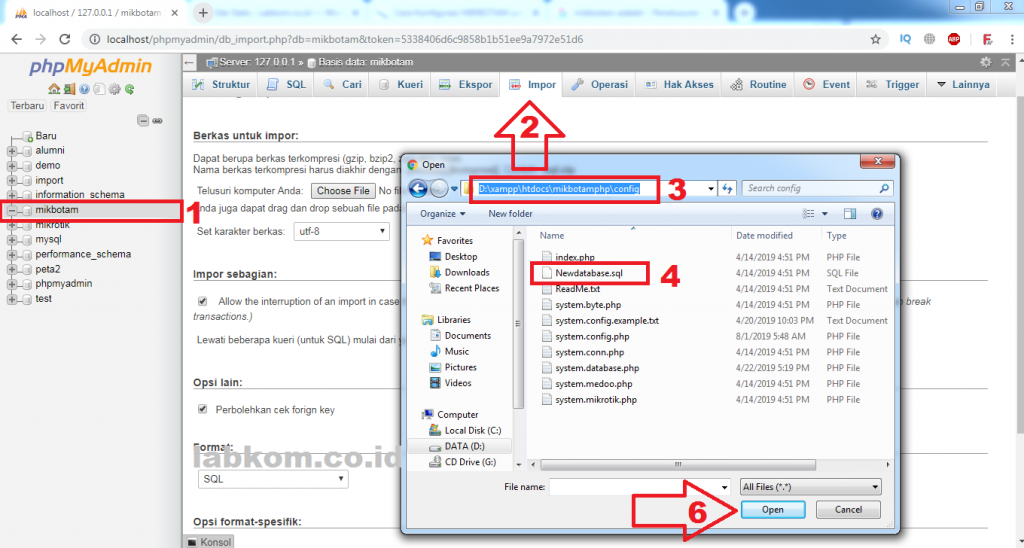
If it has been uploaded, then upload the mikbotam database in the db_mikbotam database, go to the import menu tab, then browse / choose file.
Look for the Mikbotam Settings database file in the Mikbotam application that you have saved in C:select thefile xampphtdocsmikbotamconfig,Newdatabase.sqlthen select the button send or send at the bottom left.
In this config folder, you can open the system.config.php file using a text editor of your choice, for example using notepad ++ and so on.
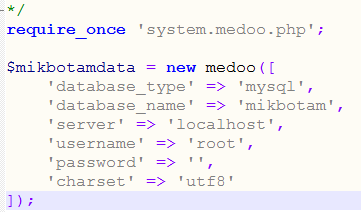
In the system.config.php file you change the $ database_name, $ server, $ username, and $ password sections according to the information in your database, for example, as the information below:
$ mikbotamdata = new medoo ((
‘database_type’ => ‘mysql’,
‘database_name’ => ‘mikbotam’,
‘server’ => ‘localhost’,
‘username’ => ‘root’,
‘password’ => ”,
‘charset’ => ‘utf8’
]);
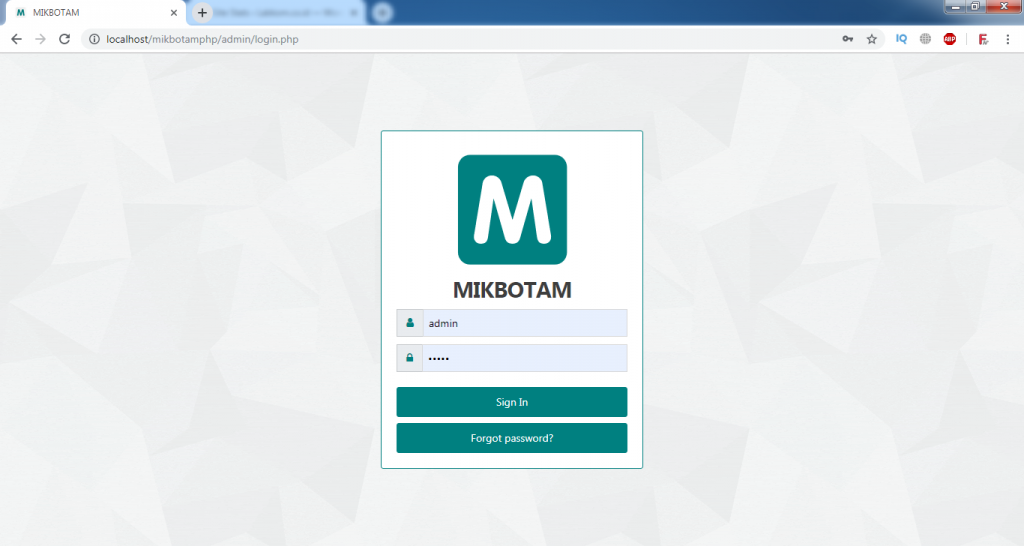
Then you can access the mikbotam application in your browser by entering the localhost / mikbotam link, if you previously named the mikbotam application folder with the name mikbotam.
![]()
On the login page of the Mikbotam Setting application you can enter the username and password information, namely admin.
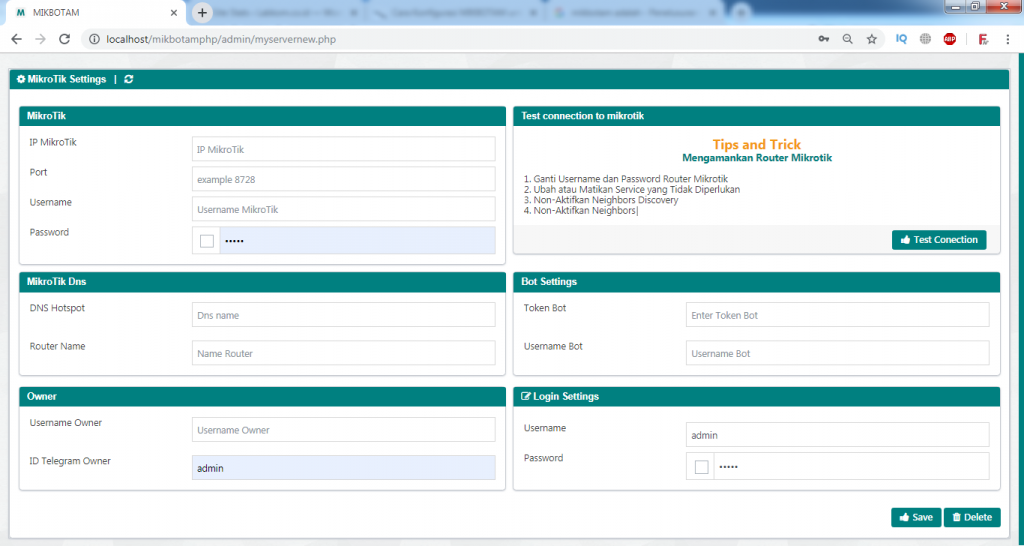
Set the mikbotam application in the Mikrotik section according to your Mikrotik account. Before that, make sure you also activate the Mikrotik API first so you can run Mikrotik on the mikbotam application.
In the Mikrotik DNS settings section, you can adjust the hotspot on your Mikrotik device.
You can find your Mikrotik DNS name is themenu IP -> Hotspot where you will see the Hotspot DNS Name.
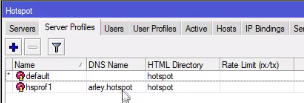
Then you fill in the Mikrotik DNS settings according to your Mikrotik.
In the bot settings section, please fill in the bot account that you have registered on telegram. Then fill in the Owner section with a telegram account, where you can fill in your username and telegram id. Make sure everything is filled now click save at the bottom right.
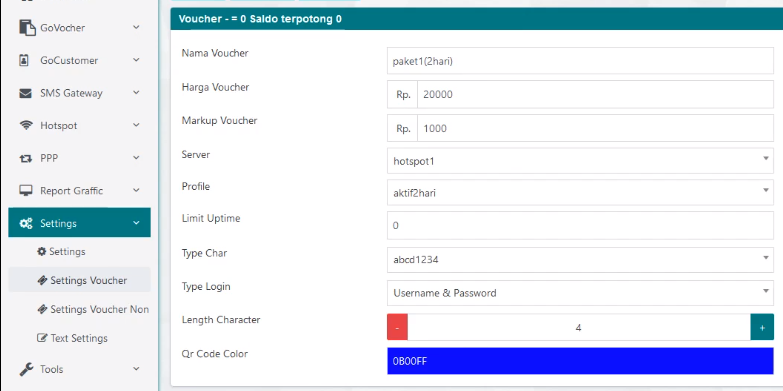
Then enter the non-balance voucher settings section with one example I made a package voucher 1.
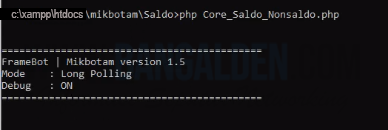
In the balance folder> mikbotam folder then enter C: xampphtdocsmikbotamSaldo copy to CMD. Then you can type php Core_Saldo_Nonsaldo.php.
Enter the telegram bot account and also type / start to run later there will be a welcome reply.
If you want to see what menus are provided, you can type / help. Previously you could register first to see the menu by typing / register and it will display your account information.
By filling in the balance for your account you can type / topup (user id) (top up value), if you have topped up, please check the balance by typing the command / check balance.
To shop for packages, please type the command / menu so it can display package info sold by the seller, please select the package and can display / generate the results of purchasing the voucher package.
Successfully, you can record the Username and Password to log in to the hotspot provided, well that’s my tutorial on setting up the mikbotam on the local server so that it causes a voucher.
How to Install and Configure MIKBOTAM on Localhost Xampp
In this tutorial, we will discuss how to install and configure mikbotam on localhost xampp.
We can also access Mikbotam on localhost from outside the network where mikbotam on localhost can be accessed online with a subdomain on a web server computer.
Preparation of
- Web Server Computer
- Xampp Download
- Mikbotam V1.8 Download
- Telegram Bot – steps to make a Telegram Bot click here
Activate API Service on proxy
First we have to activate the Mikrotik API as access we have to activate as before we have activated it by entering the IP> service menu. Or with the command CLI / ip service enable [find name = api]
How to Install MIKBOTAM and Configure it to the Database
Before installing mikbotam as before. Install xampp and run the apache and MySQL modules.
Then move the mikbotam folder into the xampp folder in htdocs.
Create a MySQL database
Create a mySQL database with a browser and go to the http: // localhost / phpmyadmin page, Create with the name mikbotam.
Import MIKBOTAM Database
If you have created the database then import the .sql file in the / config folder with the name new database.sql.
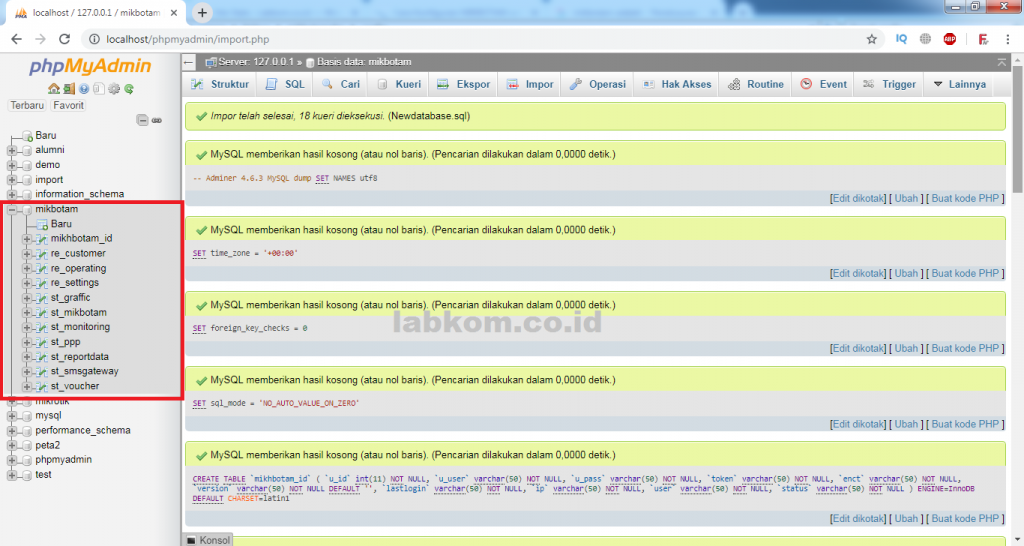
You can see the steps below after selecting newdatabase.sql> GO which will be processed to import will begin.
The results of importing the MIKBOTAM databasemikbotam
Connect the database with the Mikbotam application.
To connect the database with the mikbotam you can edit the system.config.php file in the config folder. In accordance with the database name that you created earlier. In the password section, you can leave it blank first.
Configuring MIKBOTAM with MIKROTIK
After connecting the mikbotam with the database the next step is to type the address http: // localhost / mikbotamphp (adjust the name of the folder) in your browser. Then you can enter the admin username and admin password.
MIKBOTAM Connection Test with MIKROTIK
If successful login to the mikbotam application, the following display will appear. If not, then make sure you have set the connection to the database correctly.
Then enter the Mikrotik IP, the Mikrotik API port, the Mikrotik Username and the Mikrotik Password. If you want to connect with a bot, you can add the bot token and bot username.
Display MIKBOTAM v1.8
After doing the test connection with the information success, then press save. Then it will appear like the image below where the mikbotam is ready to use.
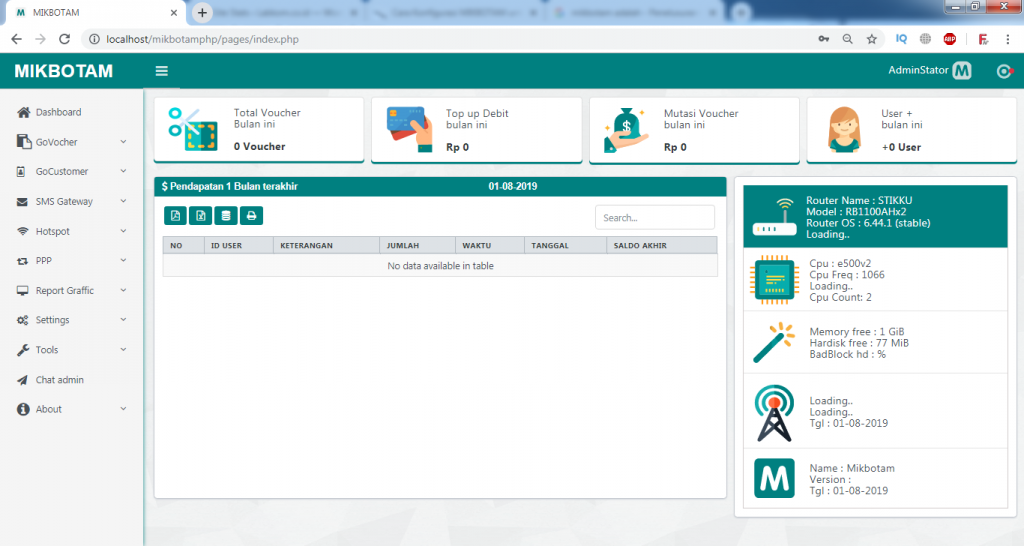
That is our discussion about the mikbotam application that is connected to a local server to help you create a hotspot bot. May be useful.
![]()
