

This time we will discuss how to monitor Mikrotik and how to install mikbotam. MIKBOTAM is a bot on the Telegram PHP chat application using the longpoling method.
Why use MIKBOTAM? Because by using this tool, there are lots of commands that can be obtained. Among them are:
- / Home – Home button
- / Menu – Menu inline mode
- / Monitor – Monitoring Wifi
- / Ping – PING local or networks
- / Dhcp – Viewing DhcpMenu
- / Address- Viewing IP Address
- / Pool – Viewing Pool Address
- / Traffic – Traffic Reports
- / Interface – Menu Interface
- / Dns – View DNS
- / PPP – PPPmenu
- / qrcode- Translate qrcode
- / Hotspot – Hotspot Menu
- / Resource – View Resources
- / Neighbors – View Neighbors
- / Ipbinding – View HotspotBinding
- / Userprofile- View User
- / Userbyprofile profiles – View users by profile
- ! Users – Viewing users
- + Users – Adding a single user
- -User – Comingsoon
- / rEm0vid – Remove Hotspot user
- / reMopsEcid – Remove Secret user
Check Router Products from NetData here:
Networks
Inspur
Networks
Access Point
Access Point 


Table of Contents
Required
What is needed in installing MIKBOTAM is as follows:
- Internet
- Computer Web Server
- Xampp Download
- MikbotamV3 Download
- Telegram Bot
After everything is finished, the next step in how to install MIKBOTAM you can continue with installing the XAMPP server first.
Actually, to install XAMPP there is no more specific way, just install it as usual. Let’s just say XAMPP is already installed on your computer and connected to the internet. So that XAMPP can run automatically, you just need to install modules on Apache.
MySQL service doesn’t need to be activated, it’s okay, because MIKBOTAM doesn’t use MySQL database.
Configuring MIKBOTAM
After MIKBOTAM has been downloaded, the next step is to move the MIKBOTAM folder to the folder where the XAMPP application is installed. Namely located in xampp> htdocs.
Change the config.php configuration in the Mikbotam> config> config.php
folder. Config.php is a file used as the MIKBOTAM configuration so that it can communicate with Telegram Bot and also with Mikrotik.

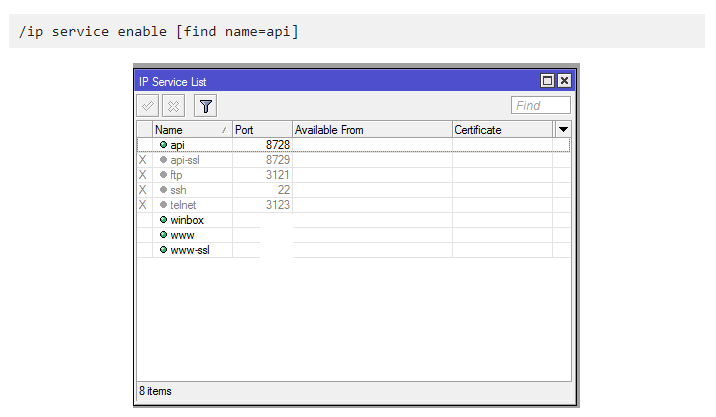
Enable API Service on Mikrotik For How to Install Mikbotam
Because MIKBOTAM uses Mikrotik Api port 8728 as access, you must activate it by going to the IP> Services menu. Or you can also use the CLI command as below:
Run MIKBOTAM
As explained above, MIKBOTAM uses longpoling. Then I have to run it using the command prompt.
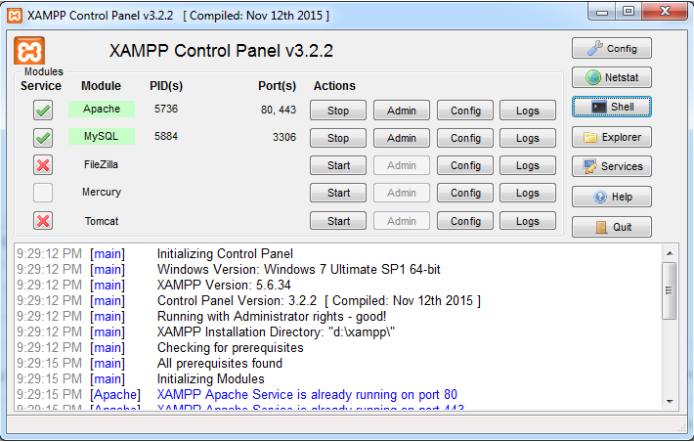
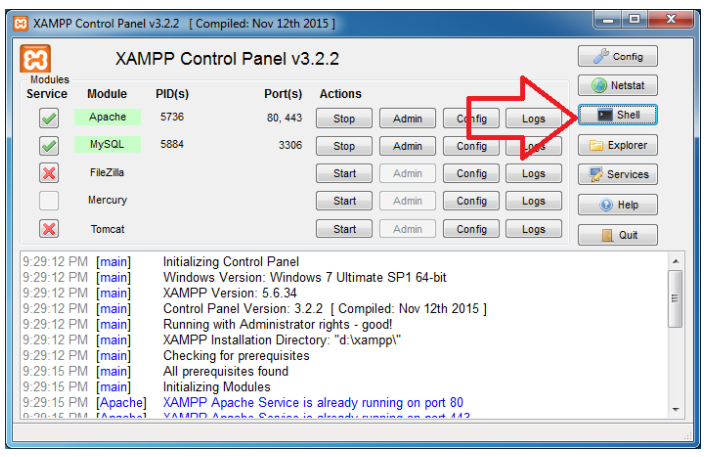
The trick is to open the Shell in the XAMPP Control Panel application.
Run mikrotik.php by:
Type cd htdocs> enter
Type mikbotam> enter
Type php mikortik.php – enter
If these steps have been carried out, then appear as shown below:

In this step, the Telegram Bot should already know various orders that are on MIKBOTAM. For example the command / home

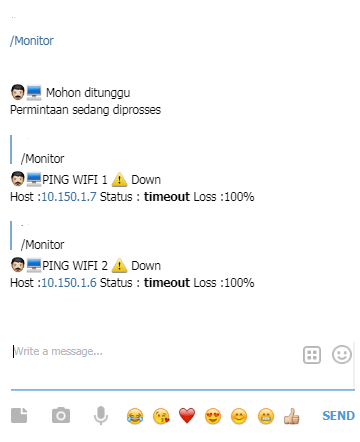
Command or monitor on MIKBOTAM for monitoring access points / Wifi
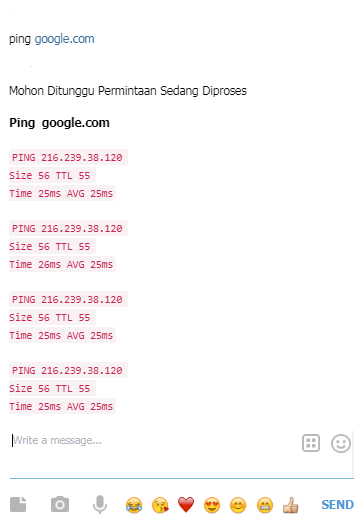
Ping on MIKBOTAM.
Those are some examples on the command / menu provided. Isn’t it easy enough to install MIKBOTAM? This bot can run continuously by only having to use a laptop or computer that is always online.
Add to Startup In How To Install Mikbotam
After completing how to install MIKBOTAM, I add to Startup. This is done so that the proxy.php runs automatically when the computer starts or after restarting. You can add a .bat file to Startup by creating a new file with a .bat extension. For more details, consider the method as follows:

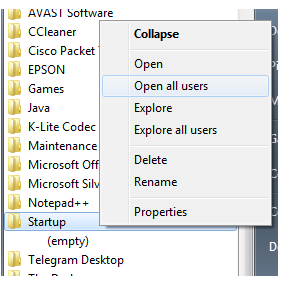
Move the next .bat file to the startup folder. The trick is to open the startup folder in the start menu, then right click and select Open all users, a new windows explorer will come out. When the .bat file is open it will automatically run mikrotik.php.
Some of the Problems encountered in How to Install Mikbotam
If you face a problem as shown below, even though the password and username are correct, this is because the RouterOS PHP API class does not support your RouterOS.
![]()
The solution is to upgrade RouterOS PHP API class to version 1.6, please download and then overwrite the routeros_api.class.php file to the include folder. Interested in How to Install Mikbotam? If you have questions, you can contact us.
![]()
