
Firewall is a system of securing Linux Server which is designed to prevent unwanted access from or to the local network. With a firewall, it allows us to do connection tracing, which later we can choose whether the connection will be forwarded, dropped, or rejected.
By default, GNU Linux itself has a built in firewall, namely netfilter or iptables. However, the configuration is quite complicated. So, we can use UFW which can be used to facilitate firewall configuration.
Table of Contents
Steps to Configure Firewall with UFW
The following are the steps you can take if you want to configure a firewall using UFW on Secure Linux Server.
Install UFW
The first thing you definitely have to do is install UFW, the method is as follows:
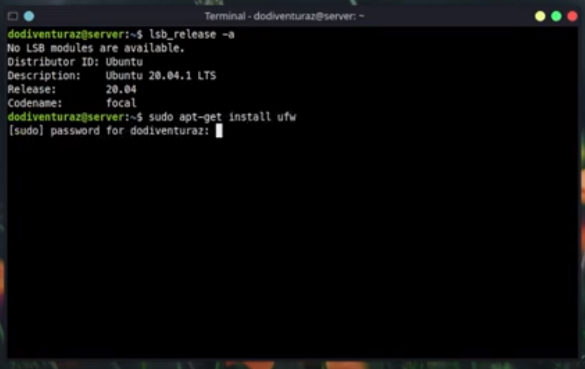
To install UFW, you can use the apt gate package management. To install it, just type the command below, then press enter.
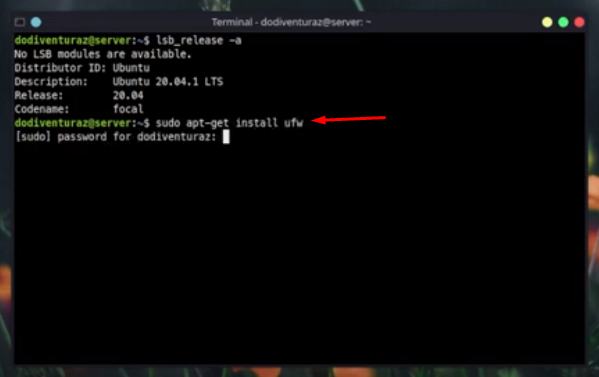
- Then enter the password “root”, and press enter
- Now UFW is installed on your Linux

Check the UFW Service
If it is installed, then the next step is to check whether the UFW service is running well or not, the method is:
- In apt gate management, type the following command:
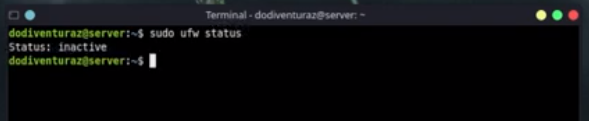
As you can see, the status of UFW is still inactive, so the service is still not running.
Basic Configuration
The next step is to do a basic configuration. So, make sure the UFW does not become your weapon. As you know, the purpose of this firewall is to block unwanted access. Don’t get blocked connections.
- The first step is to deny incoming and allow outgoing. The command is like this:
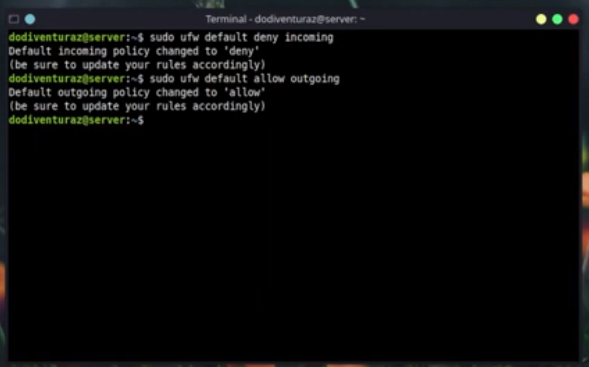
So, you can give an example if the Linux server you have is on a VPS. To root it usually is to establish an SSH connection. So, make sure the SSH service has been allowed first.
Allow SSH and Web Server
To allow SSH is to type a command like this:
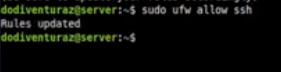
If possible SSH uses the TCP protocol and port 22, so the command would be like this:
 If you are sure that the connection you are using has been allowed, you can enable UFW by using the command:

After successfully activating and allowing basic configuration of UFW, next is to check if the rule is running properly or not.
Check whether UFW is working properly
- Check the status by typing a command like this:
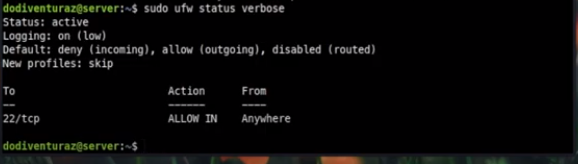
Here you can see that the TCP protocol and port 22 have been allowed.
- In this example server, there are already many services running to run UFW.
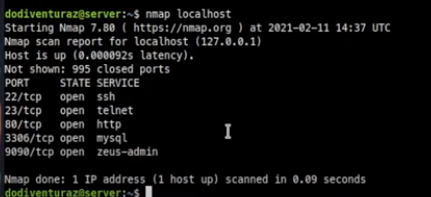
- You can verify whether this UFW rule has been running or not by accessing one of the services that have been allowed. For example, telnet and http are missing in this example.
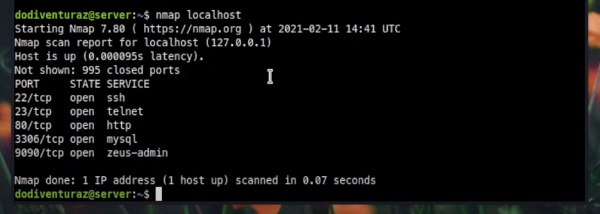
Before that, you have to check how many ip by typing the command as below:
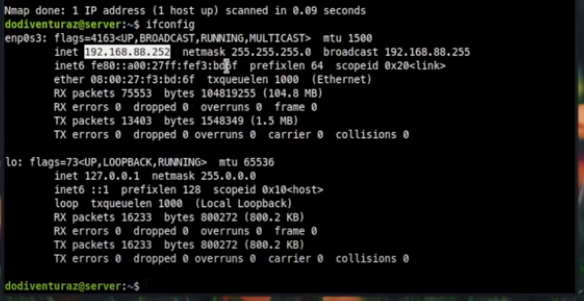
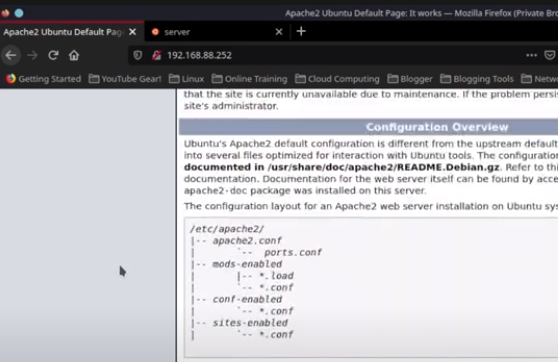
- Open a browser and type in the URL bar for the ip address.
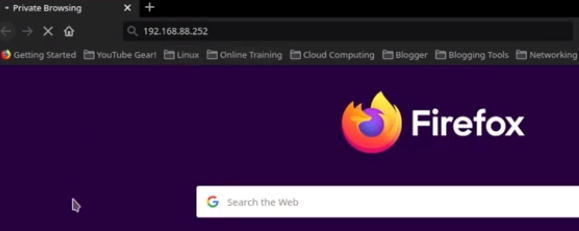
If you have loaded like this and don’t open the landing page, chances are that the UFW service is already running well.
- Check back on the server and type a command like this:
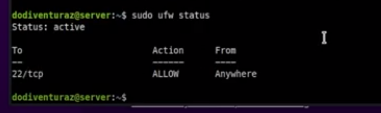
In the picture above, only the SSH status is running well.
- Now try to allow other services by typing the following command:
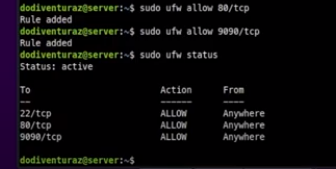
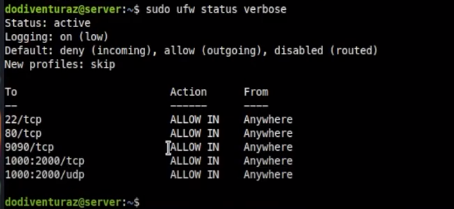
You can see if there are 3 firewall rules on your UFW and that is the sign, these three services have been allowed by UFW to be accessible from the public.
- Please verify again, whether it can run well or not.
If it can be opened with an IP that cannot be opened, then UFW can run properly. Now the 9090 port can also be opened properly.
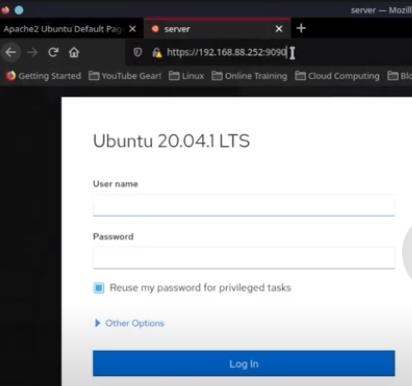
So, this UFW firewall can work properly.
Allow Telnet
All rules have worked well, but telnet is still not allowed and we still don’t know whether it can work or not. So the way is like this:
- Open a terminal, then type the command telnet
- Type ip telnet underneath
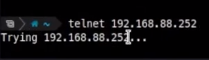
If it’s still trying, it’s still blocked with a Firewall.
How to Allow Multiple Ports Quickly
To allow multiple ports at once, the point is to be able to configure this UFW firewall quickly. The method is as follows:
- Suppose you are going to allow ports from 1000 to 2000. You do this by typing the following command:

These are the commands for UFW on the tcp protocol.
- Then try adding the allow port again in the same way but on the udp port. The method is not much different:
![]()
- Now try to verify

Here you have succeeded in adding 1000 to 2000 rules for the TCP and UDP protocols.
How to Allow UFW Based on Specific IP Address
To allow UFW configuration based on a specific IP address is as follows:
![]()
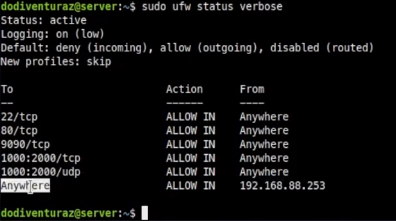
- Type in the IP address that you will allow as shown above
- The next step is to verify by typing the command as below:
How to Delete Rules on UFW
The way to remove rules on the UFW firewall is quite simple
![]()
- Just add “delete” before the allow command. And the rule has been successfully deleted.
- Try to verify whether it has been deleted or not.
You can see that the rule that was deleted has been verified and has indeed been deleted.
How to Reset UFW
Reset UFW is usually very necessary, this is so that the configuration that has been made can be lost, you can do the command as below:
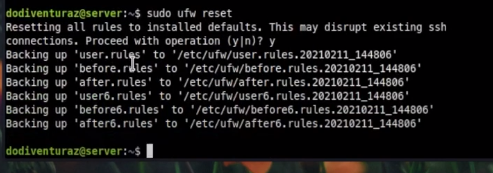
Here all rules have been reset successfully, now verify so that you are sure whether all rules have been successfully reset or not.

How to Stop the UFW Firewall Service
The method is quite easy, you can use the command as below:
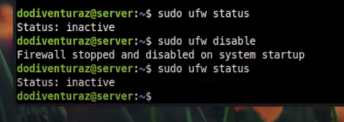
You can see, the UFW firewall status is no longer active.
Want to know more about Securing Linux Server? You can contact us for further questions. This is the way to secure Linux servers by using the UFW Firewall. Hopefully it can be helpful and useful for you to secure your Linux server or maybe just a study reference!
![]()
